Guardians of Timber: Fence Staining Masters at Your Solution
Guardians of Timber: Fence Staining Masters at Your Solution
Blog Article
DIY Fencing Discoloration: Step-by-Step Recommendations to Rejuvenate Your Exterior Space
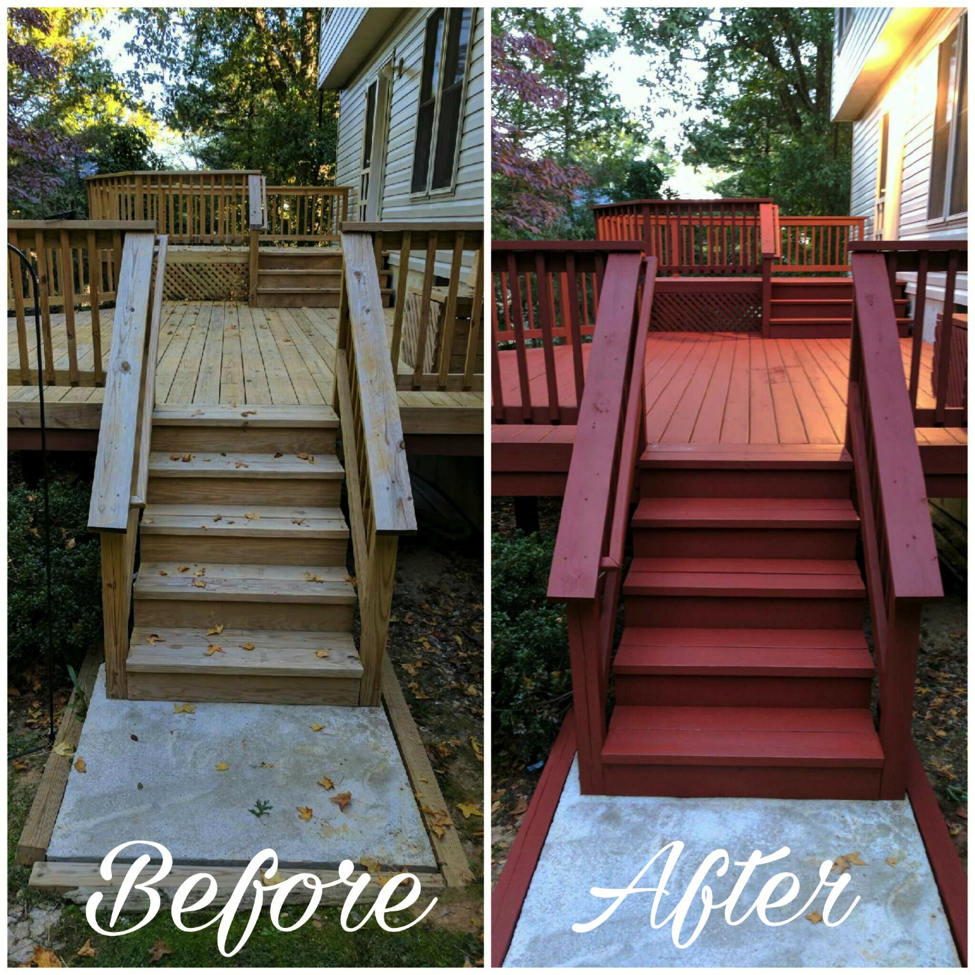
One effective means to rejuvenate your fencing and enhance the aesthetic allure of your residential or commercial property is by discoloring it. DIY Fencing Staining: Step-by-Step Recommendations to Renew Your Outdoor Area provides you with a thorough overview to accomplishing professional-looking results on your very own (deck staining nashville tn). deck staining. Obtain all set to take your Do it yourself skills to the following level with our overview to fence staining.
Collect the Necessary Materials
To gather the required materials for do it yourself fence staining, begin by putting together an extensive listing of things required for the job. This checklist should include the adhering to things:
Discolor: Pick a top quality discolor that is especially made for exterior use. When picking the tarnish for your fence., consider elements such as color, durability, and weather condition resistance.
Rollers or brushes: Relying on the dimension and structure of your fence, you may require both brushes and rollers. Brushes are excellent for getting to right into dilemmas and crevices, while rollers are more effective for larger, level areas.
Drop Cloths or Tarps: Safeguard your bordering areas from unintentional spills or splatters by covering them with ground cloth or tarps. This will certainly help avoid any kind of damages to your lawn, plants, or other outdoor furnishings.
Cleaning Materials: Before discoloring your fence, it is very important to cleanse it thoroughly. Collect items such as a power washing machine, scrub brush, and a mild cleaning agent to eliminate any gunk, particles, or dirt.
Safety Tools: Do not fail to remember to focus on safety while working on your fence. Wear protective safety glasses, gloves, and a mask to protect on your own from any prospective threats, such as fumes or chemicals.
Prepare the Fence for Staining
To prepare the fence for staining, thoroughly clean the surface area making use of a power washer, scrub brush, and light cleaning agent to remove any type of dust, grime, or particles. This step is critical to make sure that the tarnish sticks properly to the fence and gives a smooth and also end up.
Start by using a power washing machine to get rid of any kind of loosened dust or particles from the fence. Establish the stress to a moderate degree to avoid damaging the wood (fence cleaning). Relocate the power washing machine in a sweeping movement, functioning inside out, to make sure comprehensive cleansing
Following, utilize a scrub brush and light detergent to scrub the fence. This will aid eliminate any kind of remaining dirt or gunk that the power washer may have missed. Operate in tiny sections, applying gentle pressure to prevent scratching the wood. Wash the fence extensively with water to eliminate any kind of cleaning agent deposit.
After cleansing, permit the fencing to dry entirely prior to waging the discoloration process. This is vital to ensure that the stain is absorbed effectively by the wood. Depending upon the weather, this may take anywhere from a couple of hours to a number of days.
Use the Discoloration to the Fencing
To begin the staining process, thoroughly apply the discolor to the ready fence using a roller, brush, or sprayer , guaranteeing even protection and smooth application. This step is essential in achieving a professional-looking surface and enhancing the sturdiness of your fence.
If you favor to make use of a roller, choose one with a medium nap for optimum stain absorption. Put the stain right into a roller tray and roll the roller back and forth to fill it equally. Begin on top of the fencing and roll the discolor onto the surface area, overlapping each stroke somewhat for constant protection.
For bigger areas or to accelerate the process, a sprayer can be made use of. Fill the sprayer with the discolor according to the maker's directions and readjust the nozzle for a great mist or spray pattern. Hold the sprayer approximately 6-8 inches away from the fence and apply the stain in a sweeping movement, moving from side to side and top to base.
Despite the application method chosen, take care to avoid drips, runs, or merging of the discolor. Job methodically and methodically, making certain that each section gets ample protection. Once the stain has actually been applied, enable it to completely dry completely according to the maker's suggested drying out time prior to applying a second coat if desired.
Let the Spot Dry and Treatment
After applying the tarnish to the fence, it is important to allow it to dry and cure completely prior to waging any type of more actions. Allowing the tarnish to dry and remedy makes certain that it sticks correctly to the timber surface, supplying resilient security and a gorgeous coating.
To advertise correct drying, it is recommended to leave the fence untouched and stay clear of any contact with the stained surface. This means abstaining from leaning objects against the fencing or cleaning versus it. Doing so can possibly disrupt the result and tarnish in an irregular coating.
Once the stain has dried completely, it is important to allow it to treat. Treating is the process in which the discolor completely sets and hardens, offering optimum resilience and defense. This usually takes about 2 to 3 weeks, depending on the type of discolor utilized. During this moment, it is suggested to prevent any activities that might cause damages to the fresh discolored fencing, such as hanging decors or leaning heavy items against it.
Maintain and Secure Your Freshly Discolored Fencing
Consistently examine and preserve your recently discolored fencing to ensure its lasting charm and protection - deck staining. While the staining process boosts the look and toughness of the fencing, it is necessary to take appropriate care to maintain its qualities over time. Here are some pointers to preserve and secure your freshly stained fencing
First of all, on a regular basis inspect your fencing for any type of signs of damage or wear. Search for cracks, peeling off, or staining, as these can suggest issues that require to be resolved immediately. If you notice any troubles, take prompt activity to avoid more damages.
Following, maintain your fence tidy by on a regular basis getting rid of dirt, particles, and stains. Use a moderate detergent and a soft brush or sponge to delicately scrub the surface area. Stay clear of making use of harsh chemicals or abrasive materials that may damage the stain.
Furthermore, cut any kind of greenery that grows near the fence to avoid it from scrubing against the surface area, which can trigger scrapes or harm the discolor. It is likewise essential to guarantee correct drainage around the fencing to avoid water from merging and creating rot or degeneration.
Lastly, consider applying a protective sealer or overcoat to give an extra layer of defense versus the aspects. This can assist lengthen the life of the preserve the fence and stain's beauty.
Verdict
Finally, by following these try this web-site step-by-step directions, you can revitalize your exterior room through DIY fence staining. Collecting the needed products, preparing the fence, using the tarnish, and allowing it to dry and remedy are essential for achieving a beautifully discolored fencing. In addition, maintaining and securing your recently stained fencing will aid it last longer and remain to enhance your exterior area.
Use long, also strokes to spread out the stain equally, making sure to cover all surfaces, consisting of the tops and bottoms of the fence boards.
Hold the sprayer about 6-8 inches away from the fence and use the stain in a sweeping motion, moving from side to side and top to bottom.
To advertise proper drying, it is suggested to leave the fencing untouched and stay clear of any type of contact with the tarnished surface. Gathering the needed materials, preparing the fence, applying the discolor, and permitting it to dry and treatment are necessary for attaining a magnificently tarnished fencing. Furthermore, preserving and securing your freshly discolored fencing will assist it last longer and continue to boost your exterior location.
Report this page